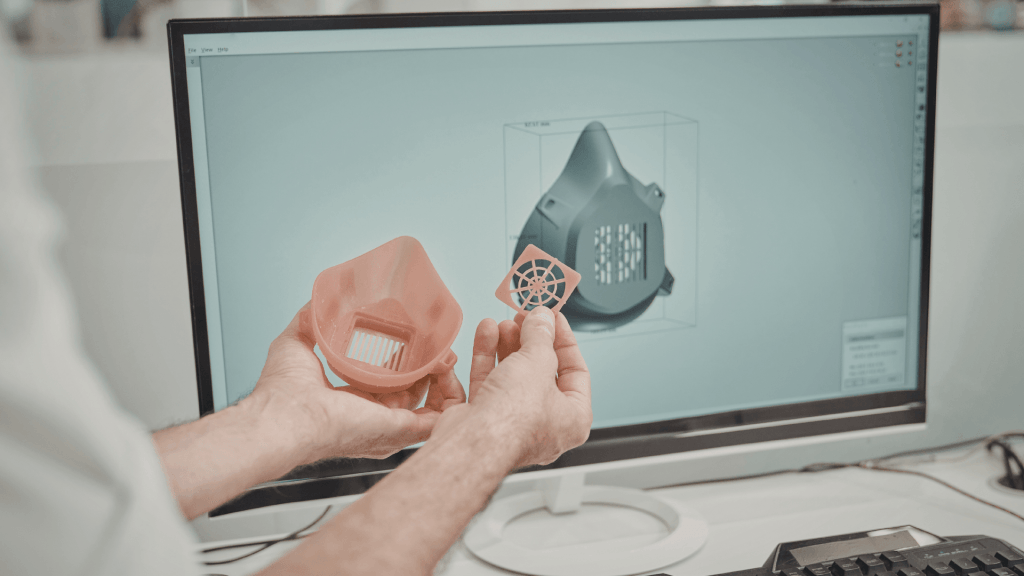
In factories, workshops, and engineering offices around the world, there is a familiar moment of frustration. A critical part needs to be replaced or modified, yet the drawings are missing, incomplete, or buried somewhere in a long-retired filing system. Sometimes the part predates modern design software. Other times, it was altered on the fly and never properly documented. When that happens, reverse engineering is not just helpful. It becomes essential.
This challenge is exactly what object-level 3D capture is designed to address. Instead of relying on manual measurements or guesswork, engineers can now create detailed digital representations directly from physical objects. Tools like the handheld 3D scanner have made this process more practical than ever, allowing teams to capture complex shapes quickly and with confidence. As products age and supply chains shift, the ability to digitize existing parts has become a quiet but powerful advantage.

Understanding Object-Level 3D Capture in Reverse Engineering
At its core, object-level 3D capture is about translating the physical world into usable digital data. The focus is narrow and intentional. Rather than scanning entire rooms or environments, this approach concentrates on individual components, assemblies, or tools that require close dimensional analysis. The goal is not just visualization, but accuracy that supports engineering decisions.
For reverse engineering, this matters a great deal. Many parts include curves, transitions, or surface details that are difficult to describe with traditional measurement tools. Object-level scanning captures the full geometry in one dataset, preserving features that might otherwise be missed. Once digitized, the object can be examined, measured, and rebuilt in software without repeatedly handling the physical part.
Core Technologies Behind 3D Scanning
Most object-level scanning systems rely on optical measurement methods. Structured light scanning is one of the most common. It works by projecting a known pattern onto an object and analyzing how that pattern deforms across the surface. Infrared imaging is often used alongside it to improve tracking and depth perception.
Some systems also incorporate depth-sensing technologies that help maintain alignment over larger surfaces or during longer scanning sessions. Regardless of the underlying method, the purpose remains consistent. These technologies collect millions of data points that together form a point cloud or mesh. That digital surface becomes the raw material for reverse engineering.
The Role of a Handheld 3D Scanner
The appeal of a handheld 3D scanner lies in its freedom of movement. Instead of forcing a part to conform to a scanning setup, the scanner moves around the part. This simple shift has practical consequences. Components can be scanned where they sit, whether that is on a workbench, inside a machine, or mounted in place.
For engineers and technicians, that kind of flexibility can make a noticeable difference in day-to-day work. Instead of taking equipment apart or hauling heavy parts across a facility, they can capture what they need right where the part sits. Seeing the scan take shape in real time also helps catch gaps early, before they turn into extra work later on. In many workflows, handheld scanning has become the most practical way to collect accurate geometry without bringing everything else to a halt.
Accuracy and Resolution Considerations
Not all scan data is created equal, and in reverse engineering, quality matters. Accuracy determines how closely the digital model matches the real object. Resolution defines how much surface detail is captured. Both play a role in whether the final model can be trusted.
A part that looks correct on screen but deviates slightly in key dimensions can cause serious problems once manufactured. For this reason, engineers pay close attention to accuracy when scanning functional components. Resolution becomes especially important for features like small fillets, embossed markings, or complex edges. Striking the right balance ensures the scan supports engineering intent rather than complicating it.
A Typical Reverse Engineering Workflow
Reverse engineering with object-level 3D capture tends to follow a straightforward flow:
- Preparation: The team starts by assessing the part, looking at its size, material, and surface condition. Lighting and the surrounding environment are also checked, since they can noticeably affect scan results.
- Scanning: The operator moves around the object, capturing overlapping passes to ensure full coverage. Adjustments are often made along the way as missing areas or alignment issues become visible.
- Post-processing: The scans are then aligned, cleaned up, and refined to create a complete and usable dataset.
- Reconstruction: Finally, the processed data is brought into design software, where the part is rebuilt as an editable, reusable model.
From Scan Data to CAD Models
Raw scan data rarely tells the whole story on its own. Post-processing is what turns a dense collection of points into something useful. Alignment algorithms ensure consistency across scans, while cleanup tools remove artifacts that could distort measurements.
Once processed, the scan is exported into formats that integrate with CAD and inspection tools. Engineers use the scan as a reference, tracing features and defining dimensions based on the captured geometry. The result is not just a copy of the original part, but a functional digital model that reflects design intent and can evolve over time.
Practical Challenges Along the Way
Even with all its advantages, object-level 3D capture still has its challenges. Shiny or transparent surfaces can confuse optical scanners, which sometimes means extra prep work just to get a clean scan. Tight spaces and hard-to-reach features can also make things tricky, even when using a handheld device that is designed for flexibility.
Data management presents another hurdle. High-resolution scans generate large files that demand processing power and storage. Without careful optimization, scan data can slow down downstream workflows rather than improving them. Recognizing these constraints helps teams plan scanning strategies that deliver value without unnecessary complexity.
Where Object-Level 3D Capture Makes an Impact
Object-level 3D capture has quietly become a go-to tool for reverse engineering across many fields, simply because it solves real, recurring problems.
- Manufacturing and maintenance: When parts wear out or are no longer available, 3D capture makes it possible to recreate them with confidence. This helps teams keep equipment running, reduce unplanned downtime, and get more life out of existing systems.
- Product development: Bringing physical prototypes into the digital environment shortens redesign cycles. Engineers can check fit, explore alternatives, and incorporate older components into new designs without starting from scratch.
- Education and research: Scanned models allow detailed study of mechanical systems while preserving the original parts. This approach supports learning and analysis without risking damage to valuable or irreplaceable components.
The Growing Role of Handheld Scanning Tools
The role of the handheld 3D scanner can also be seen in how tools like the 3DMakerpro Moose are helping close the gap between hobbyists and professionals. With features such as AI-assisted tracking, markerless scanning, blue light technology, and up to 0.03 mm accuracy, it lowers the learning curve and makes precise scanning of medium-sized objects more approachable for prototyping and design work.
The steady evolution of handheld 3D scanner technology reflects a broader shift toward accessibility. These tools are becoming easier to use, faster to operate, and more tolerant of real-world conditions, which is why they are finding their way into more workflows and more hands.
Conclusion
Object-level 3D capture continues to move forward, driven by steady improvements in sensors, automation, and data handling. What used to be a labor-intensive step in reverse engineering is becoming smoother and more intuitive, allowing engineers to spend less time managing data and more time making informed design decisions.
Converting physical components into dependable digital records helps protect valuable knowledge that might otherwise be lost over time. In that sense, object-level 3D capture does more than support reverse engineering. It helps carry design understanding forward.

Peyman Khosravani is a global blockchain and digital transformation expert with a passion for marketing, futuristic ideas, analytics insights, startup businesses, and effective communications. He has extensive experience in blockchain and DeFi projects and is committed to using technology to bring justice and fairness to society and promote freedom. Peyman has worked with international organizations to improve digital transformation strategies and data-gathering strategies that help identify customer touchpoints and sources of data that tell the story of what is happening. With his expertise in blockchain, digital transformation, marketing, analytics insights, startup businesses, and effective communications, Peyman is dedicated to helping businesses succeed in the digital age. He believes that technology can be used as a tool for positive change in the world.


